Followers

Tuesday, December 11, 2012

Grade 6 Patterned Tree Designs


6th Grade Patterned Tree Designs
I found inspiration for this lesson on Pinterest. The pictures were by T. R. Mack and Amy Giacomelli. They both have an Etsy shop site. 
    
          T. R. Mack                    Amy Giacomelli 

I first discussed value and demonstrated blending colors. They were to choose monochromatic  or analogous colors for their backgrounds. The darkest of the colors would be at the top slowly changing to the lightest at the bottom. Once painted and dried, they drew a simple stick figure tree in pencil. They then went over their drawing with black tempera paint to create a silhouette of a tree. I demonstrated how to thicken the tree and had them work upside down on this step because it seemed to help them work the trunk into each branch and paint downward with the brush instead of upward. The next step was to do a practice sheet of 2 color designs in oil pastel on white paper; either swirls or circles. They needed at least 5 combinations of colors varying from dark to light. They would then start adding them to their landscape in layers (darkest to lightest) from the top of the sky, middle of the sky, to the bottom of the sky. They chose contrasting color combination for the foreground and tree branches. Last we added gold paint to show what direction light was coming from. Here a the results:


Monday, December 10, 2012

Kindergarten Cardboard Fish, Owls and Turtles


Kindergarten- Cardboard Fish and Owls...and Turtles!


This lesson was borrowed from Deep Space Sparkle. We prepared the pieces of cardboard by using tempera, forks, and sponges. One class did plain colored backgrounds and scraped designs in the wet paint using forks. Another class painted with 2 colors and then sponged in a 3rd color. The last class painted stripes and then stamped designs using circle shaped sponges. I had a 3 day weekend where I cut the shapes. Ugh...After about 20 each of the fish and owl shapes, I decided a new shape was in order so I did ovals for turtles. I also cut several triangles, circles, ovals and rhombuses from all the scraps. They chose their pieces from bins I had organized for each shape. While they were busy wrapping their animal body, I ran around with a glue gun. The glue sticks just wouldn't hold. If they still had time, I had them use oil pastels to add details. Putting up the masterpieces was a challenge. We have bulletin boards but staples couldn't hold the cardboard. I resorted to push pins. Most held but I had to do some mending and re-pinning. The teachers just loved these.


Grade 1 Torn Paper Owls


1st Grade- Torn Paper Owls


The original inspiration for this lesson came from Mrs. Brown's site. The tutorial for drawing an owl was from here.


The lesson went as follows:
Day 1- each child drew an owl with guided instruction on white paper
Day 2- Glue torn paper on owl
Day 3- Cut out circles for eyes. Added feet and log. (I hot glued it after they made the pieces)

We added googly eyes and layered cut tan circles on top of black circles for the eyes. While doing the aftercare program one afternoon, one of my students decided she wanted to add a paper log and pipe cleaner feet. I had her share her ideas with her class. They were all excited to add it to theirs as well. I added their names in gold marker.


4th Grade Moonlit Nights

4th Grade Moonlit Nights

I originally got my idea from Natalie at Elementary Art Fun. She was inspired from Mary at http://marymaking.blogspot.com/.  I pretty much followed Natalie's great lesson with a few changes. We talked about blending colors, highlights on the trees and ground and drawing trees. Students wanted to add other things in their picture so we have some owls, a bat...They also wanted to make it sparkle so we used glitter (Yes I know, but I don't hate it). Some chose to do glitter around their moon. Others did their firefly trails.

This class went on a field trip on the day They were going to add some mist and then I forgot during the next class but I think they came out well.


Sunday, December 2, 2012

Blogging Backlog

Ok. I've been so busy being a new art teacher that I haven't found a good time to post lately. Guilty. I've got a lot of excuses. It's been 2 months. We've done a lot of really great projects. Really. In any case, I've got to get a routine about posting. I put the artwork up. I take pictures. That's when I drop the ball. Alright, here's the plan for the next month. I'm going to share one lesson I've done each day; well, maybe every other day. I have to be realistic. I really want to share, if for no other reason, to thank you all for the impact you have made in my life. I love my job!

Friday, September 28, 2012

September

One month has already gone by. The first projects are up on the bulletin boards ready for Open House on October 4th. My fellow teachers have been stopping in and telling me how great they are. Phyl stopped in yesterday to see me. It was great to see her and hear what she thought about my projects. It means a lot to me to continue the great program Phyl developed here.

I'm having fun doing what I prepared to do in college over 30 years ago. I realize there's a lot to get through this first year and I will continue to adjust my methods and procedures but, overall I'm feeling excited. I'm so grateful there is a blogging community out there to support me. You all have a part in my metamorphosis from computer teacher to art teacher. As I post my projects this year, I'm going to try to give credit to all of you who have helped, but when I first started researching and saving lessons, I did not copy the website addresses. So if you are the one to credit, please let me know.

MONDRIAN ABSTRACTS- Kindergarten

Kindergarten used primary colored squares and rectangles
in the style of Piet Mondrian to create their abstract pictures
In Kindergarten, we discussed lines and shapes and talked about Mondrian and his abstract paintings. I wanted to do a little cut and paste activity and this is what I came up with. I cut strips of black paper 9" x 1/2". I also cut squares and rectangles of different sizes in red, yellow and blue. I found my inspiration here.

We began talking about horizontal (hamburger) and vertical (hot dog) ways to hold our paper. They put their white paper on their table in the horizontal position. We took a piece of black paper and I showed them how to use a glue stick, turn it over and stick it to the paper. We then took a colored shape and placed it next to the black line and glued it in place. I showed them how to line up another black strip around the shape, cut it and glue it. They were instructed to continue to cover the edges of the colored shapes each time they added another one.

Well some of them got it and others went off on "creative tangents". All in all I liked the results. The photos aren't the best. I'm not used to the new camera settings.


SUNFLOWERS- 2nd grade

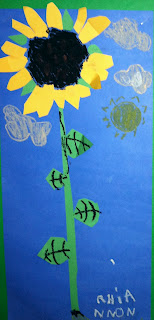
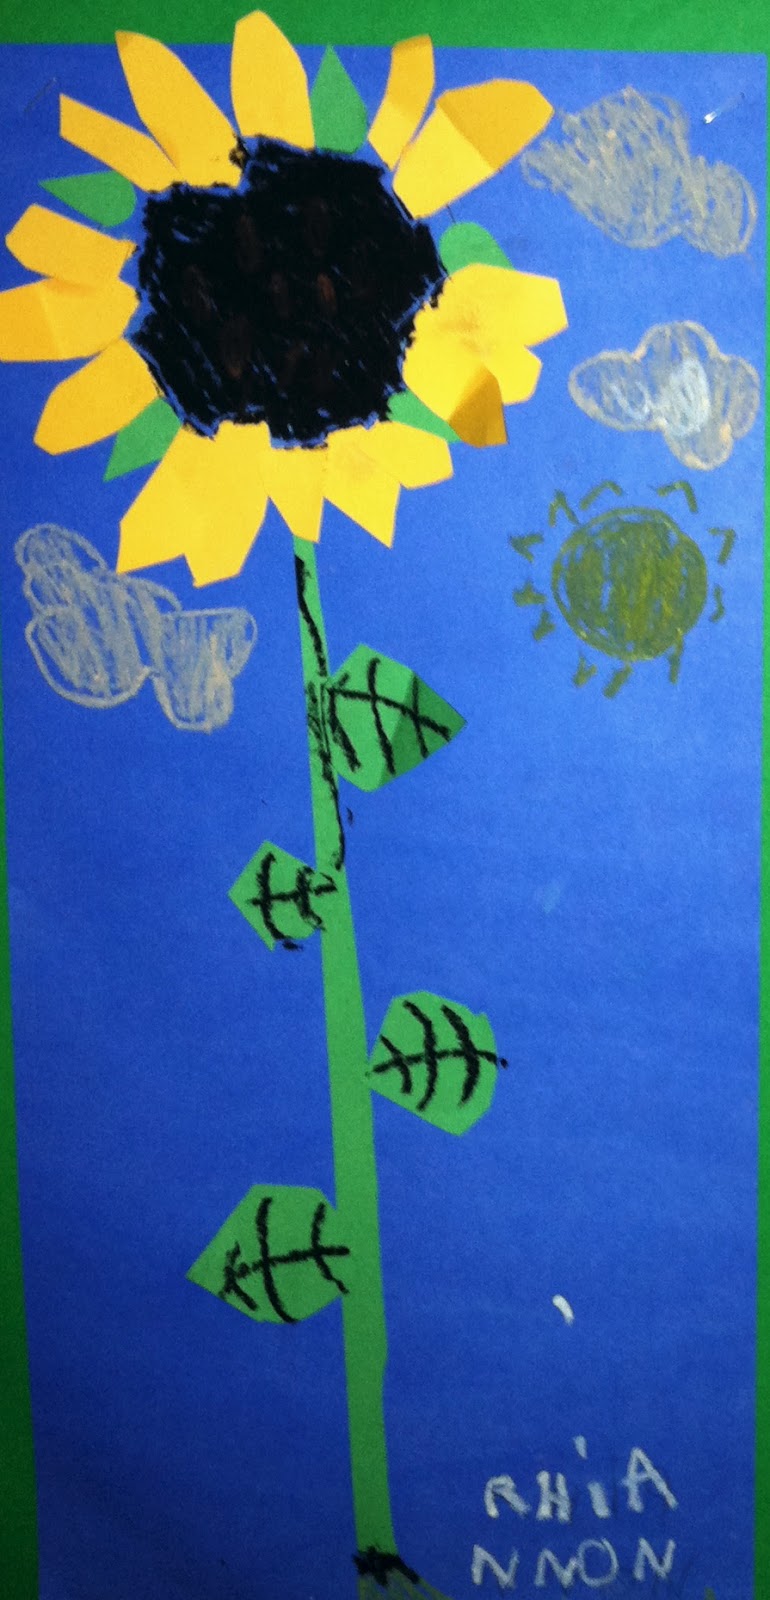
My second and third graders worked on sunflowers. We had many blooming around the school this fall. I picked them just before the rain storms finished them off. We talked about the parts of a flower and looked at Vincent Van Gogh's sunflower pictures.

The second graders did cut paper flowers practicing on their cutting and pasting skills and used oil pastels for line details. I gave one class blue paper and another class orange.


Steps:
Day 1- Discuss parts of a flower. Draw stem, leaves and seed head. Cut strips of green paper and glue leaves, stem and sepals.
Day 2- Cut strips of yellow for flower petals and glue down so the ends stick out. Use oil pastels to do line details on flower, leaves, seed head and negative space.


SUNFLOWERS- 3rd grade


The 3rd graders used tempera and oil pastels and worked on line detail & proportions. I changed the lesson, but saw an idea similar on Deep Space Sparkle.


Steps:
Day 1- Discuss parts of a flower. Draw vase, table line and seed heads. Divide vase in half.
Day 2- Use paint to fill in background, table and vase. All paper should be covered.
Day 3- Add line detail to vase, stem, leaves, table cloth, seed head and background(wallpaper).   Lastly use yellow tempera to paint in petals.


Letter & Line Designs- 5th Grade 

The 5th grade used their names to create a design. Each letter had to touch but not overlap and create smaller spaces for the line design. Colors needed to be balanced throughout the picture. Patty from Deep Space Sparkle posted it here. We used markers and black sharpies.


Floating Letter Designs- 6th Grade 

The 6th grade used their names to create a balanced colored design. The letters had to overlap. All adjacent spaces had to be colored a different color. The idea was originally posted by Mrs. Art Teacher. We used sharpies to color them in.


Thursday, September 6, 2012

My First Day

I survived! I started with 3 kindergarten classes. Not the best idea but I got through it. I figured it was downhill from there and I was right! We have a large kindergarten this year. Last year we had 24 in all. This year we have 57! Enrollment is up (50 new ones) in our little school, but with less teachers class size is up too.
By the time I taught the 3rd kindergarten, it went much better. I spent a little time talking about the rules, but then we started right in because I didn't want to loose them. We started with a line drawing exercise with crayons. By the 2nd class, I changed that to markers. (Much easier to see. ) We'll work on pressing harder later.
Note to self:  Don't start with Kindergarten. They need a few days to get settled in school.

My 4th and 6th grade class put together sketchbooks and we talked about rules, rewards and report cards.

My Room

I spent a lot of time rearranging and reorganizing the room. I also read may blogs for ideas and classroom management tips. THANKS to everyone I have borrowed from, in case I forget to mention it. It was left in great shape when Phyl retired, but everyone needs to arrange it to make sense for their teaching style. So here's what the main bulletin board looks like looks like:
My theme this year is "Spread Your Art Wings"
Our school's character traits with an art twist.

My job chart is changeable. I can assign either by seat number or table color.
I have the jobs pinned so I can move them.

The PRINCIPLES posters. I put them low so students can read the examples.
The picture frames will hold the picture or art work of the "Student of the Month"
I will award one for K-3 and another for 4-6.

I put my own twist on this idea. 

A 'younger" version of myself!

The ELEMENTS posters

The 6th grade zone explains how they will be graded.
I will use the same for other grades, but the letter assigned changes.

A copy of the Passport the 6th grade will work on.
My intention is to have them record their reflections on
their artwork and print /paste a picture next to it.
Later in the year I will have them do an online portfolio
on MuseumBox.com.

Not sure I will need the blue boxes, but I'm not ready to get rid of them.
The small colorful boxes are for passing out materials to tables.
Some are also labeled by class so they can put their sketchbooks there.

Lots of cabinets to dry and store artwork.
My whiteboard will remind them of the lesson steps.

This month is Piet Mondrian.

Clean up sinks. There is also a slop sink by the 6th grade zone.

Phyl's wonderful painted color wheel.
I have color coded table boxes there with supplies.
I couldn't find a yellow one to match the others this year
so I have an extra red one.

I brought the metal cabinets from my old room.
The large one stores most of my paint bottles.
The yellow one on the left is full of supply bins.

I will post the essential questions for each grade.
They are color coded to match their sketchbook boxes.

The inside of my storage closet.

More shelves of materials.
I will label things so I don't forget where they are.

In the back are shelves for large works in progress.
Phyl also left me samples on the top. :)

Shelf on the left is for when they are done their assignment.
The large desk stores reference materials & art samples.
Next to the storage door is my teacher cabinets and my desk.
I'm still working to reduce the clutter.

We have 3 large windows looking south over a roof.
The air conditioner is needed because it gets a lot of reflective sun,
and I'm at that age...

Looking from the door.
The rollable blue table contains large paint, plaster and clay...
I am making some fabric covers so it will look neater.

I have a sign out to leave the classroom and another to come for crEATe.
Create is for those who want to come at lunch to EAT and CREATE.
This year not all my 4-6 classes can come at lunch, so I
call it ReCREATE if they come at recess. 

A view from my corner of the room.


Pardon the long blog, but I wanted everyone to see if I borrowed their idea. Also pardon if there are spelling mistakes because I left my glasses somewhere! I'm not too up to snuff on how to post yet. I didn't know how to post one picture so it can bring up the others. It's 3:00 in the morning. When I came home I went right to bed and woke up at 2:00 am. I never get any sleep the night before the 1st day. Thanks again to everyone out there blogging. It has really helped get me ready.